As our kids' birthdays came close, my wife and I began talking about what we could do for them for gifts this year. Nat was turning 11, and Godzilla would be 7. Every year we take a family trip in leu of throwing a party, and the kids love it. We have done zoos and water parks and resorts and museums, all requiring a long drive, and most needing a night in a hotel (hello, pool!) This year would be no different, as we planned a day at Holiday World in southern Indiana. Apart from the trip, we wanted to give them something that would be fun and used daily around the house, and so we started looking at Lego tables.
Who doesn't love Lego? We have tubs of the little plastic bricks, and no real dedicated place to play with them. The best options are usually either the kitchen table, or the toddler height train table. Seeing as how we like to eat at the kitchen table, and our toddler height toddler likes to put things in his mouth, neither of those options are actually good options for a Lego table for our house.
So, we settled on making a table which would solve those two problems, Pinterest is full of ideas on how to create a table for use with Lego bricks. Unfortunately, most of them include this instruction: "Glue multiple base plates to a table." Have you priced Lego base plates? Have you counted how many you would need to cover a table large enough to actually give your growing kids room to play? The answers to those questions told me to find a better way. So here's my response.
Why does a Lego table need to have plates glued down? Why turn a play scape into an expensive uni-tasker? Why does this table need to be a permanent fixture in any room in my house? I bought a resin folding banquet table and a few cans of spray paint, and now my kids can play Lego (or anything else they want) in their bedroom (or anywhere else in the house I want to let them). Take a look at how easy it was!
Drop $50 on a folding banquet table, and $3 a can on spray paint. Use old newspaper and that roll of painters tape you have laying around to make sure you get a clean edge.
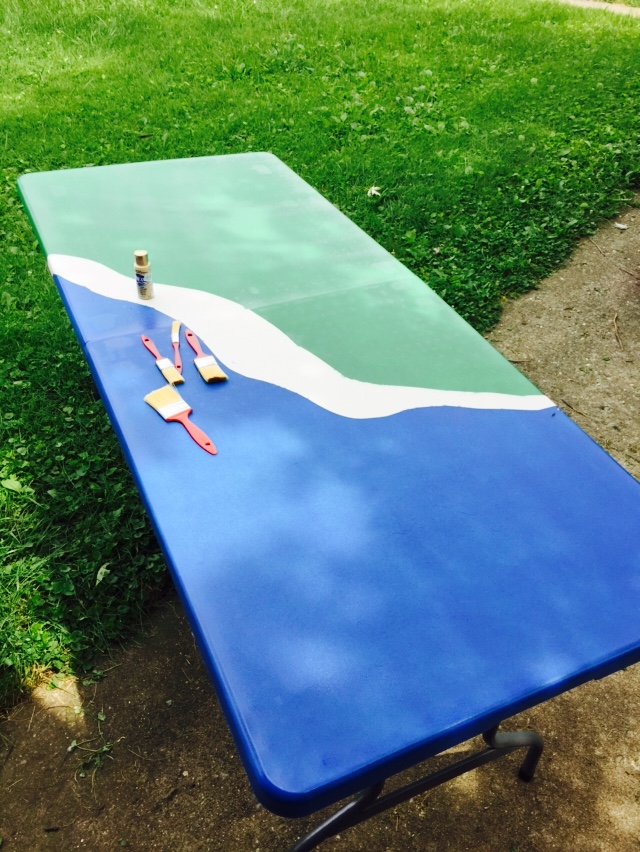
Start by taping off a shoreline. Make sure you cover anything you don't want blue in newspaper, then give it a good coat of blue.
|
Spray paint dries pretty quickly as long as each coat isn't too thick. Leave just a little space beyond your blue water line and tape off the area you want to become your grassland. Don't forget the newspaper, and paint it green, like those crazy Californians do in a drought!
Spray painting can be messy and your finger may cramp up with excessive coverage if you do it the old fashioned way. Instead, try this tool made by Krylon. It's a trigger handle for your paint cans, and it makes painting a snap. You simply slip it on the top of your can and go.
|
|
Once both sides have been painted, you're left with a narrow strip for your beach. Pick up some yellow craft paint and a brush, and start filling in the white space.
 |
This table didn't have a sharp edge to end the color at, so I just wrapped it right down the side for a clean finish.
|
Before setting your kids loose on your new piece of environmental art, add a few coats of clear enamel to protect your finish. The last thing you want, is for your kids' Lego masterpieces to scrape away all your hard (not that hard!) work.
|


No comments:
Post a Comment